
 Cuando cambiamos de un sistema operativo a otro, lo primero que echamos en falta son elementos que generalmente no están dentro de nuestras prioridades, pero a los que inconscientemente estamos acostumbrados y que, si nos los cambian, nos sentimos totalmente perdidos.Durante los primeros días que empiezas a utilizar Mac OS X, en mayor o menor medida, pasa éso.
For more than 10 years using the different versions of Windows (Starting with 3.11 and ending with Vista), I have become accustomed to various features of the Microsoft system, as well as some particular features of PC computers.
How do I maximize windows?
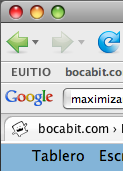 En Mac OS X no existe un botón para maximizar las ventanas como el que existe en Windows, y éso es algo que me creó bastante incertidumbre los primeros momentos. En la parte superior izquierda de las ventanas se encuentran los equivalentes a los tres botones que Windows sitúa en la parte superior derecha de las ventanas (Minimizar, restaurar y maximizar). En Mac OS X tenemos el botón de cerrar (rojo), el de minimizar (amarillo) y uno verde, que en contra de lo que cabría esperar, no maximiza la ventana, sino que cambia su tamaño dependiendo del programa que se trate.
Thus, if we are in Safari or Firefox, it (generally) makes the size of the window adjust to that of the web page we are on. If we are in iTunes, it will alternate the reduced view with the normal one, and if we are in Windows Messenger, it will make the window take up the entire screen or part of it. We could call this button ‘the panic button’.
Maximizing windows is not as necessary as I thought, but there is a program called MegaZoomer that, by combining Command + Enter, makes a window occupy the entire screen. Unfortunately, it only works in applications that belong to the Cocoa application interface (For example Trasmission or iChat).

Screenshots
On Mac computers, unlike on PCs, there is no “Print Screen” or “Print Screen” key. Instead, there are several key combinations that allow you to perform the function of this key in more optimal and precise ways.
- Command + Shift + 3: Takes a screenshot of the entire screen
- Command + Shift + 4: Allows you to select a rectangular area with the mouse and then capture it.
- Command + Shift + 4 + Space Bar: Takes a screenshot only of the window we select, the menu bar or the dock.
Captures are saved on the desktop in png format, which may seem like a limitation to some users, but its functions can be extended using an external program, such as shotChoice, which allows us to choose the output format of the capture.
The menu bar
Something that draws a lot of attention about **Mac OS

‘Default menu bar’
Like everything, this draws attention at first, but once you get used to it, it is just as comfortable as with Windows menus, although, while true, it can be a bit confusing if we have many programs running at the same time.
Possibly, this menu bar interface is the cause of the mess that Windows Vista (and XP) users have to endure in programs like Internet Explorer 7 or Windows Live Messenger, in which they are disabled by default.
Install programs on Mac OS
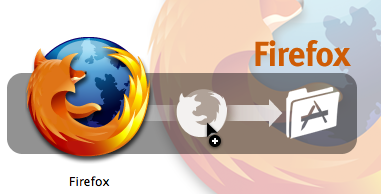
‘To install Firefox just drag…’
At this point we find ourselves at the height of simplicity. The first time I decided to install the first program on Mac OS