
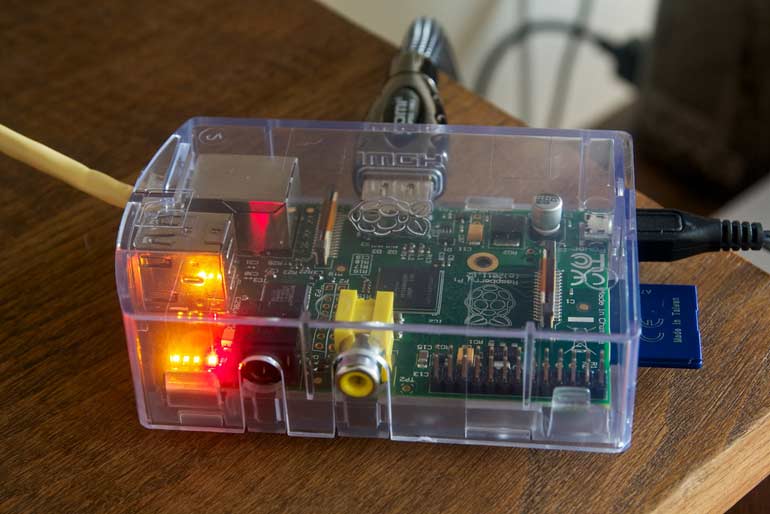
For a few days now I’ve been playing around with a Raspberry Pi, a cheap mini computer the size of a credit card that can be loaded with a light Linux distribution to use it mainly as a media center to watch series and movies.
This post belongs to a series of posts about Raspberry Pi:
- First steps with a Raspberry Pi
- [Customize the buttons on a remote control for
- [Configure SAMBA on the Raspberry Pi with Openelec and external hard drive](/2013/06/10/configure-samba-on-the-raspberry-pi-with-openelec-and-external-hard drive)
The advantages it offers compared to another media center are many. It consumes very little energy, it is cheap, it is powerful enough to fluidly play an MKV at 1080p 5.1, it does not make any noise, you can install XBMC, which is compatible with CEC (to be controlled with the TV remote control) and it also works AirPlay.
My first steps with the Raspberry have been a love-hate relationship because I haven’t been able to configure it completely to my liking, but everything will work out.
What does it take to make a Raspberry Pi work?
- The Raspberry Pi can be purchased from its official website.
- A fast SD card (class 10) to put the operating system (to use as a hard drive)
- An HDMI cable (recommended 1.4 compatible with CEC to be able to control it with the TV remote)
- A power adapter or a mini USB cable.
- A casing (optional, but having the plate on top of the furniture looks ugly, right?)
- An ethernet cable to connect to the Internet and the home LAN.
- Install an operating system.
What operating system do I choose?
The three best-known systems for the Pi that exist are Openelec, Raspbmc and xBian. They all have the same objective, which is to use the Raspberry as a media center, so they all include XBMC. I chose Openelec because it is the one that was recommended to me; It supposedly works smoother than the others because it only installs what is needed and it also has a large community of users behind it.
Installing Openelec
First of all we will download Openelec from its official website.
Once downloaded, we must copy the files to the SD card. If you use Windows or Linux, you have two tutorials here (in English):
- Install Openelec on Windows: How to install openelec on Raspberry pi with windows
- Install Openelec on Linux: Installing Openelec on Linux
I have installed it on Mac OS X, for which the steps are very simple.
1. Format the SD card as FAT using disk utility.
Then we will open the terminal and enter the following commands.
2. Check SD card location:
diskutil list
[caption id=”attachment_8677” align=”aligncenter” width=”560”]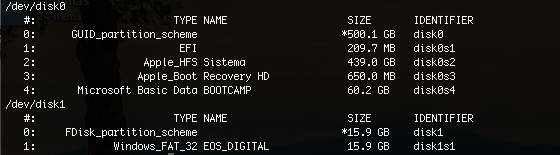 In this example it is /dev/disk1[/caption]
3. Disassemble the card unit:
diskutil unmountDisk /dev/disk1
In this case the path is “/dev/disk1”, but in your case it may be another.
4. Copy all operating system files to the card (it will take a while):
sudo dd if=/Users/rene/Desktop/r11542.img of=/dev/disk1
At this moment we already have our operating system ready, so, having the Raspberry disconnected from the power and connected to the TV via HDMI (or video cable), we will put the SD card in the Raspberry and connect it to the power. The Openelec logo should appear on TV.
In subsequent tutorials I will write how to customize the installation and configure some interesting elements (external hard drives, remote controls, etc.).